Merchant Apps
Shopify
Required Steps:
Creating a custom app
Creating a webhook
Creating the Wirecash payment option
Customizing the checkout order page
Entering Shopify API credentials into your Wirecash account
Step 1: Creating a custom app
A custom app is an app that you only build for your own Shopify store.
1. Enabling custom app development from the Shopify admin (if it isn't already enabled)
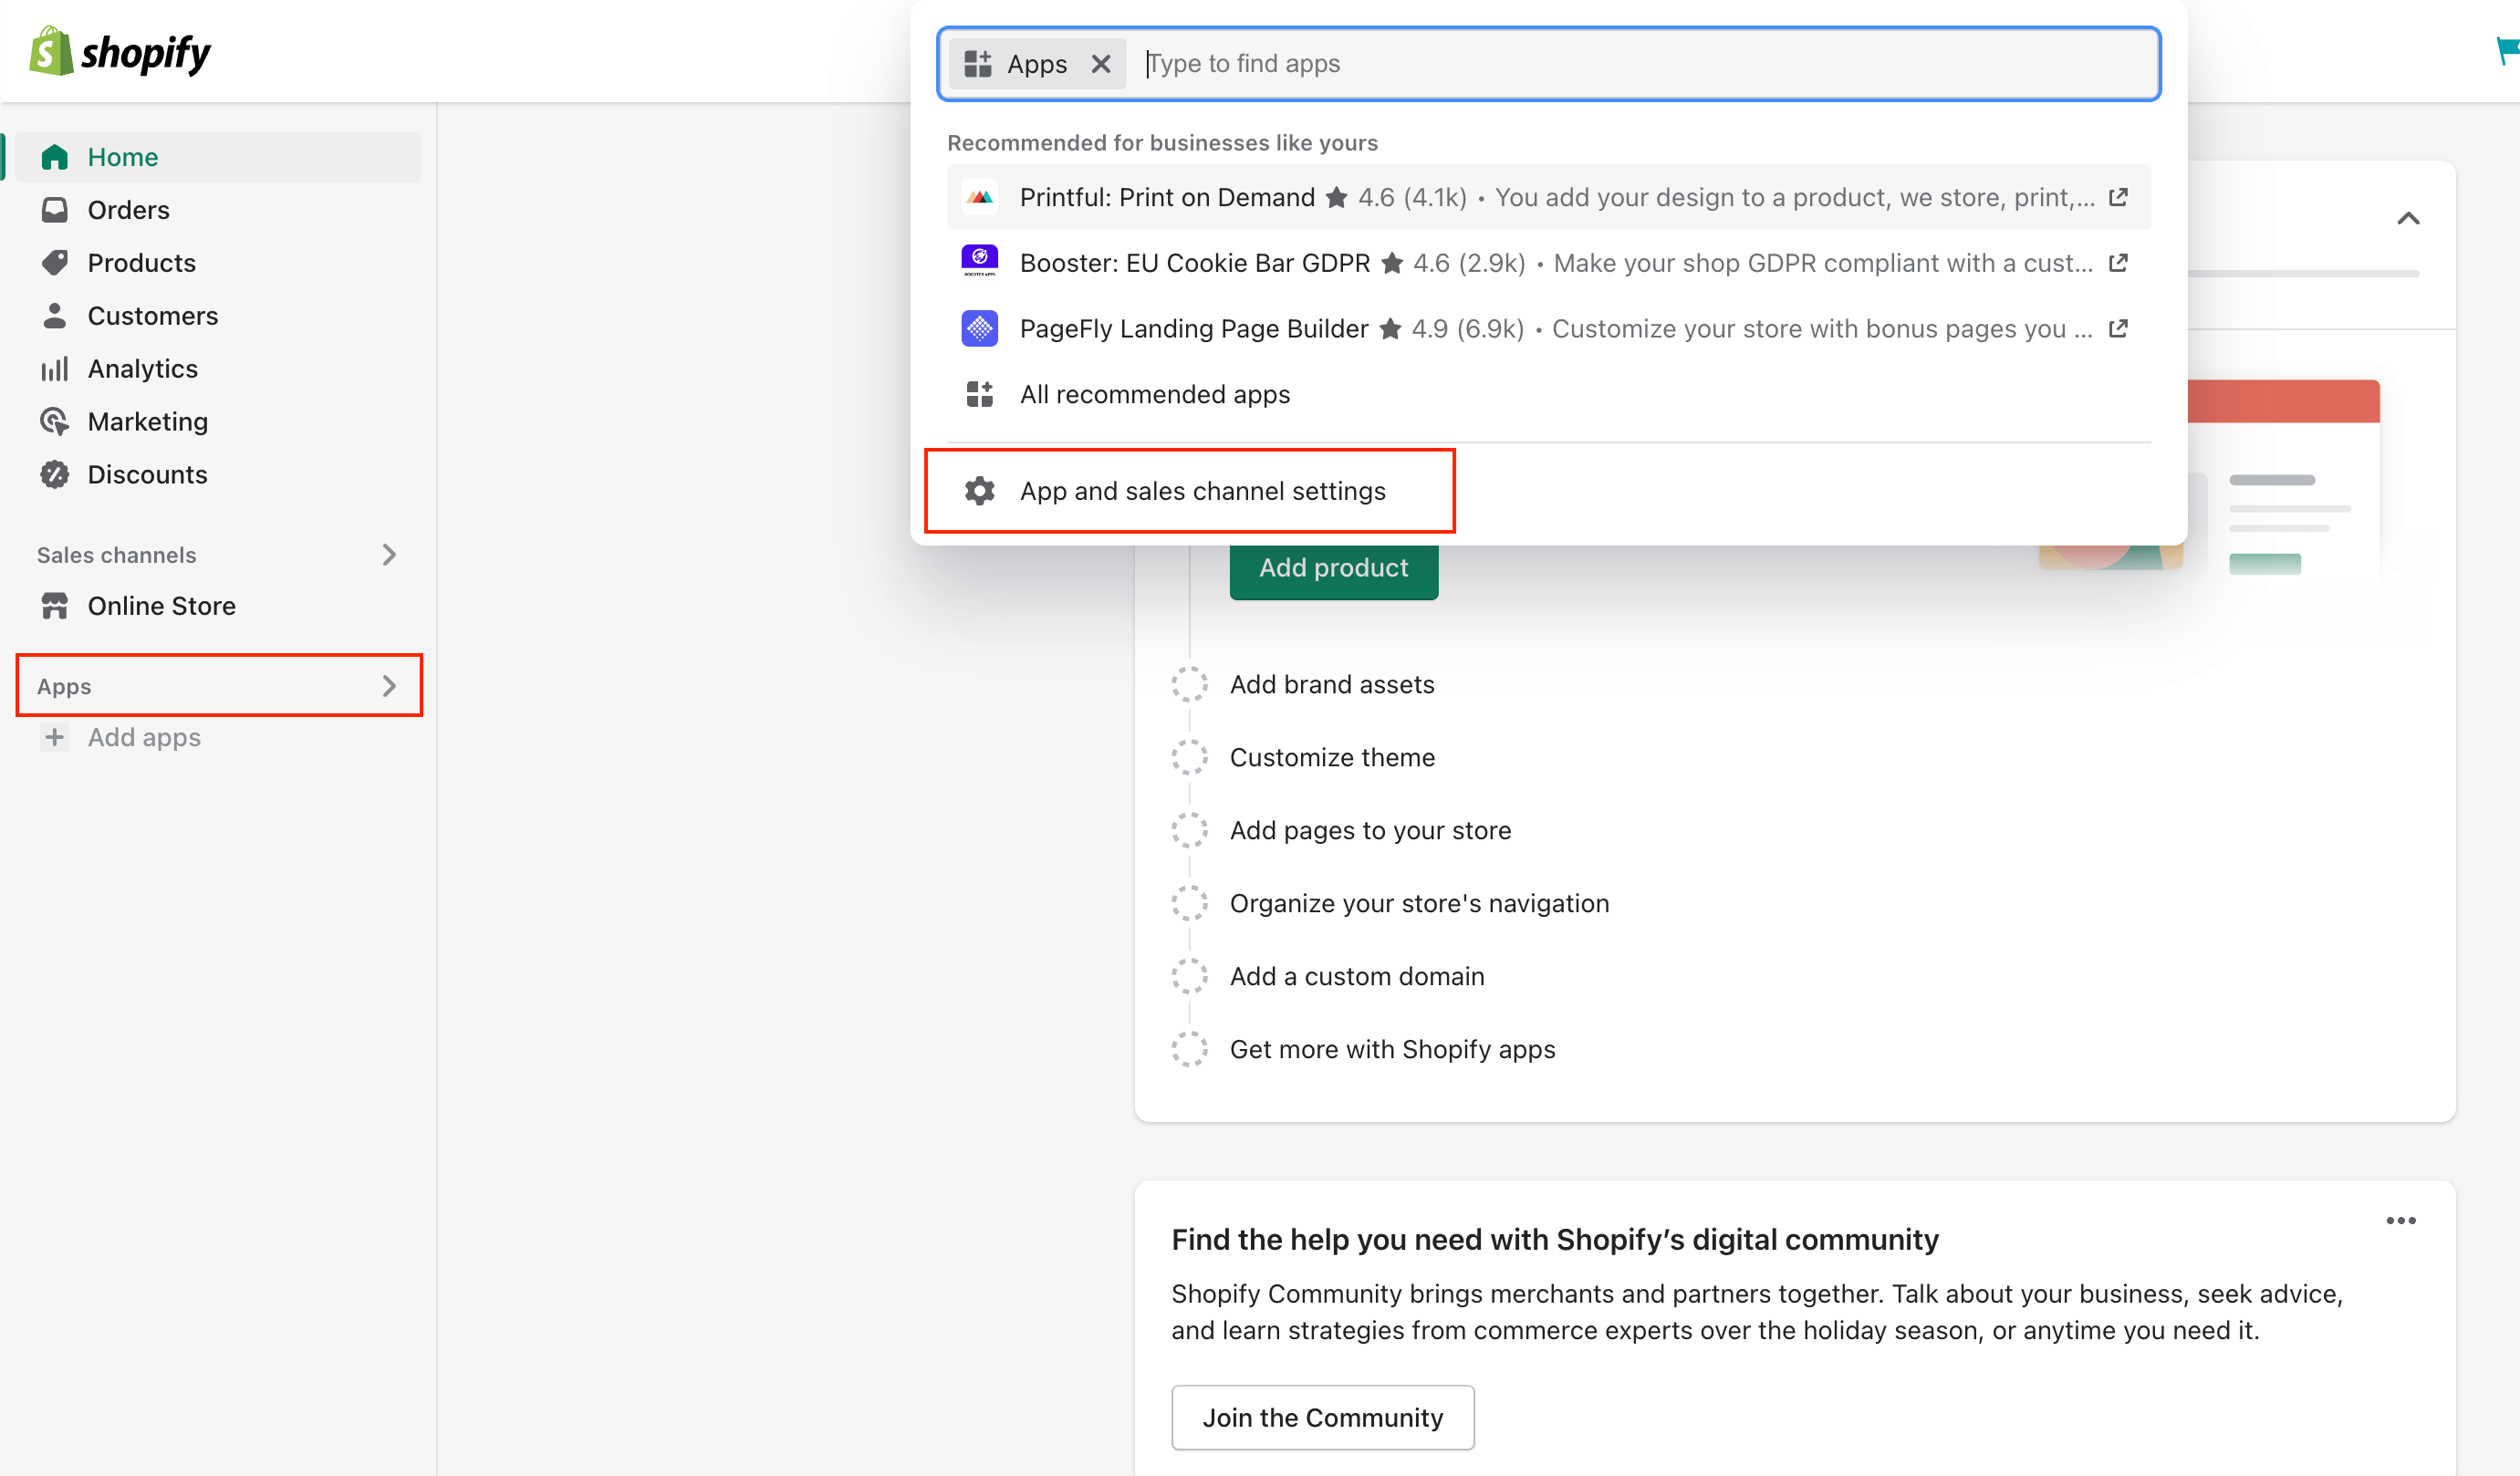
- From Shopify admin, go to Apps
- Click App and sales channel settings
- Click Develop apps for your store button
- Read the warning and information provided, and then click Allow custom app development
2. Creating the Wirecash custom app
- From Shopify admin, go to Apps
- Click App and sales channel settings
- Click Develop apps for your store button
- Click Create an app
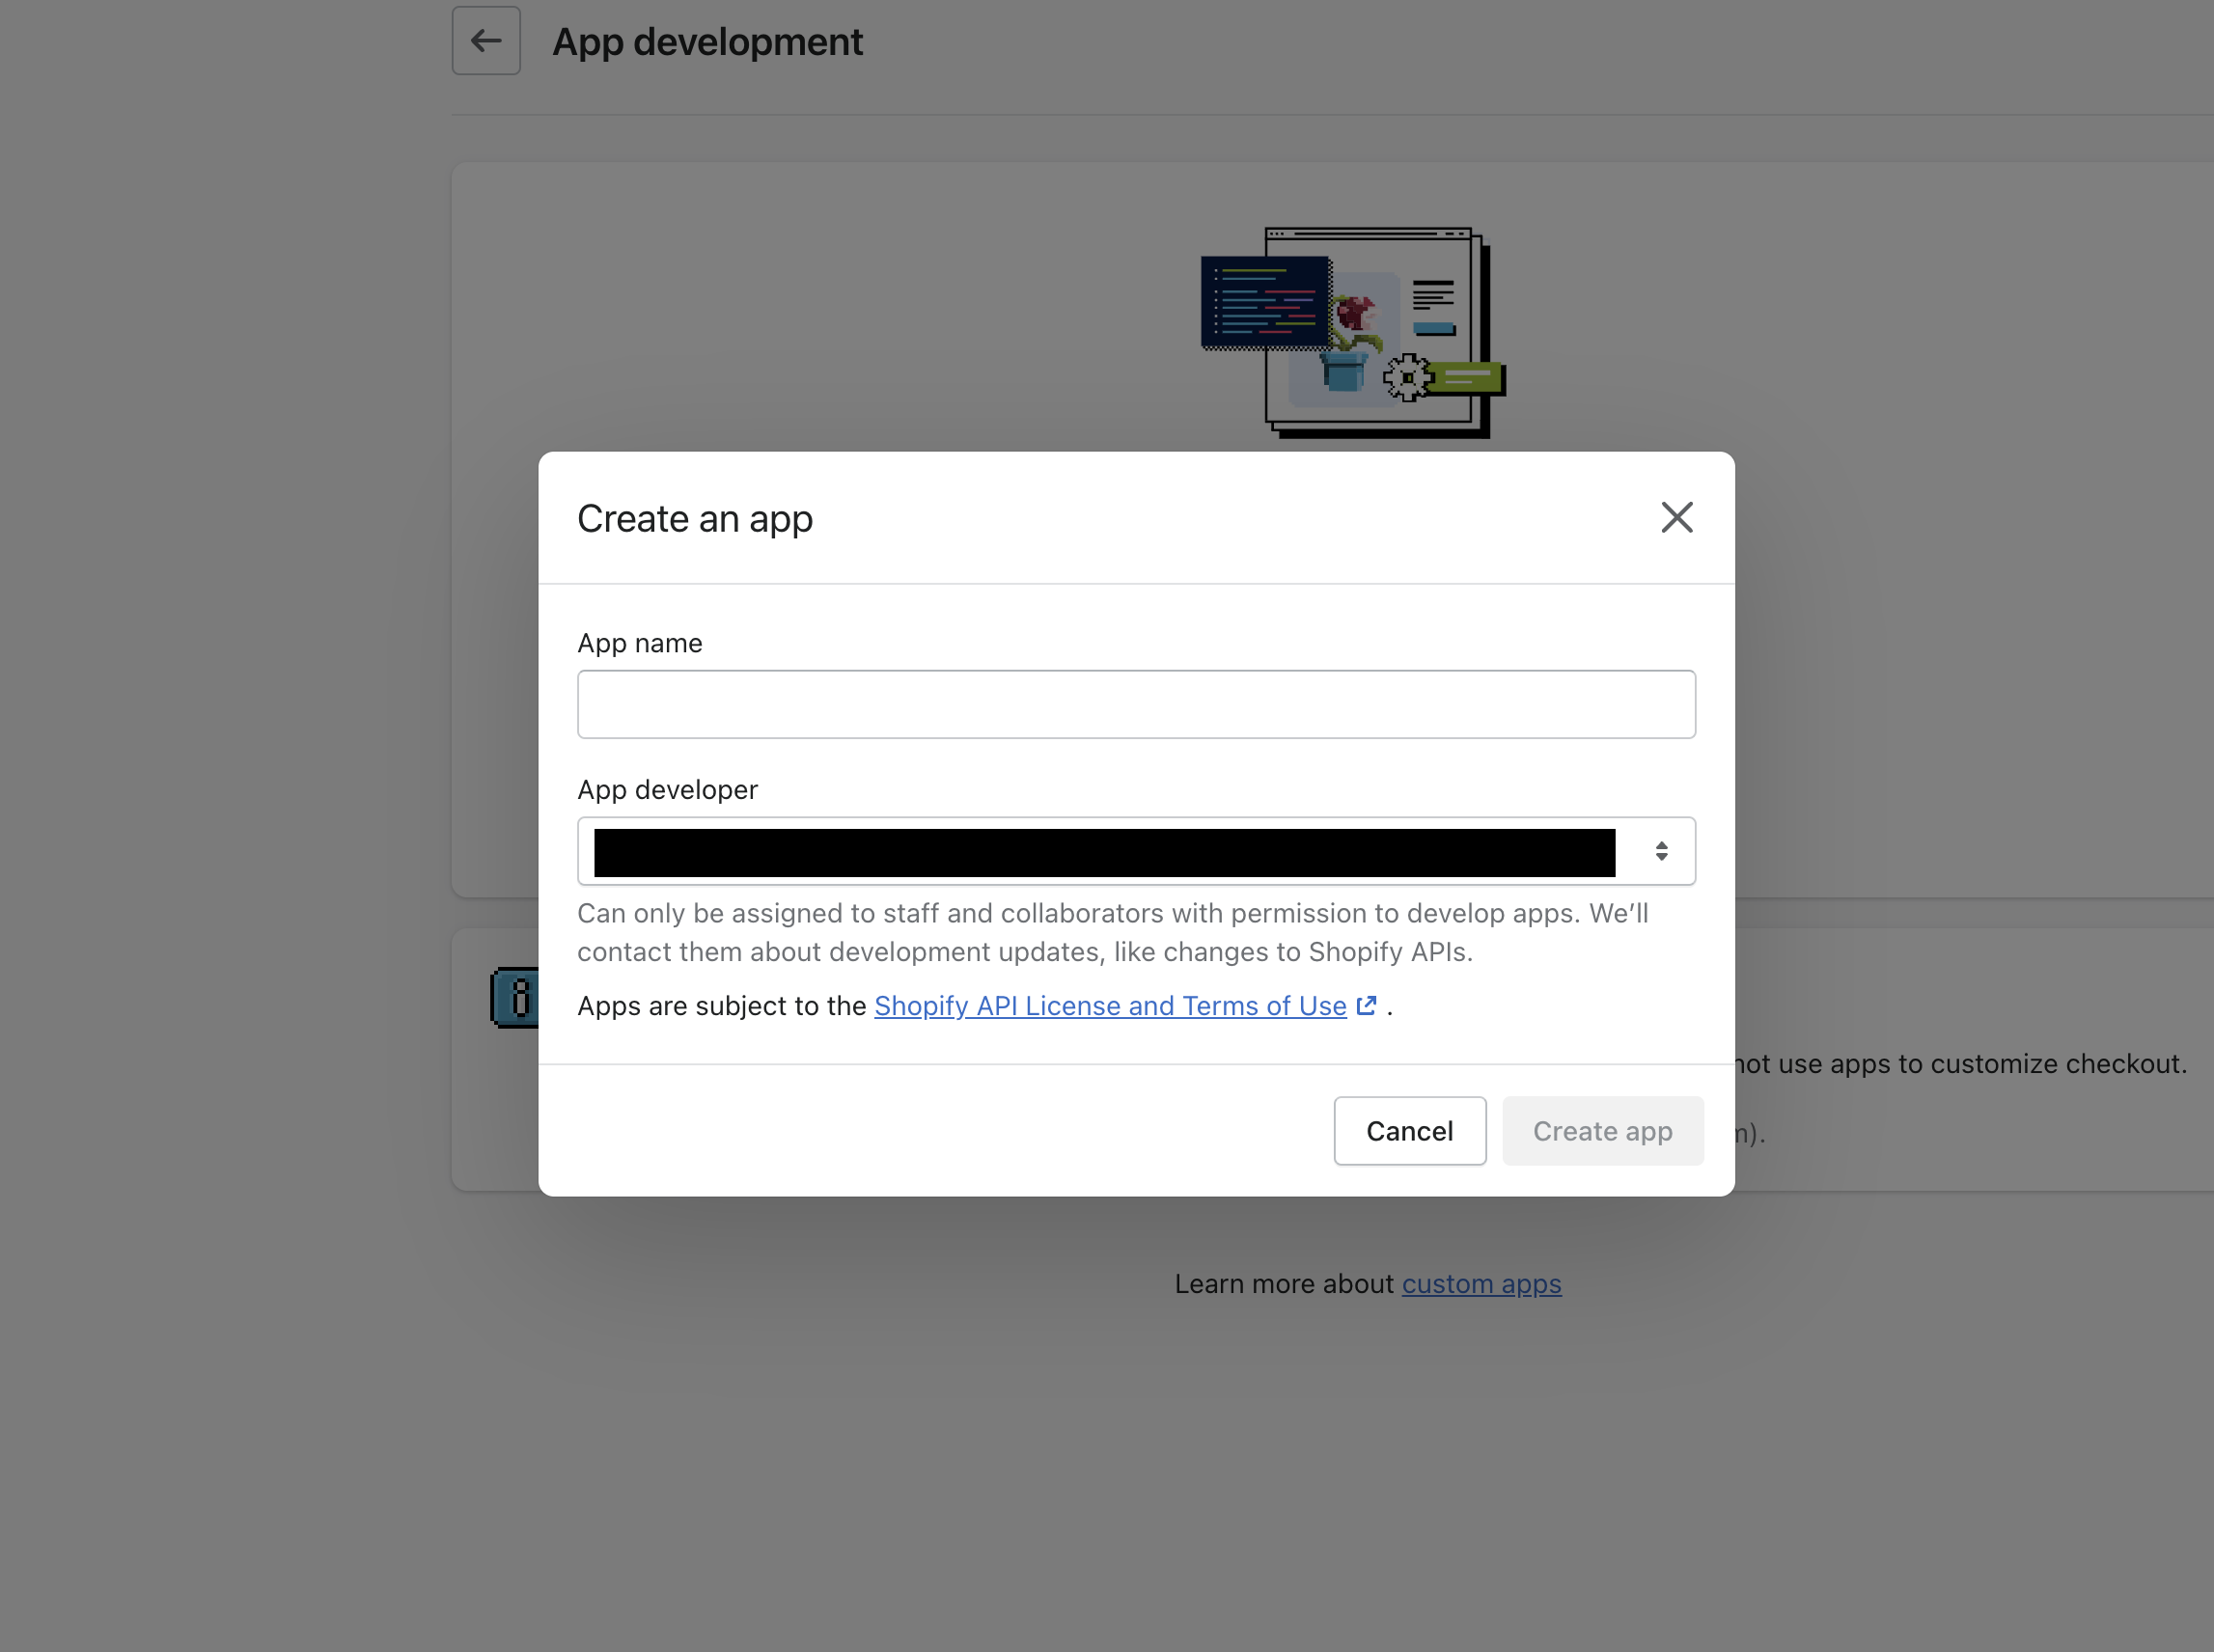
- In the modal window, enter the App name (WIRECASH) and select an App developer. The app developer can be the store owner, or any staff or collaborator account with the Develop apps permission
- Click Create app
3. Selecting API Scopes
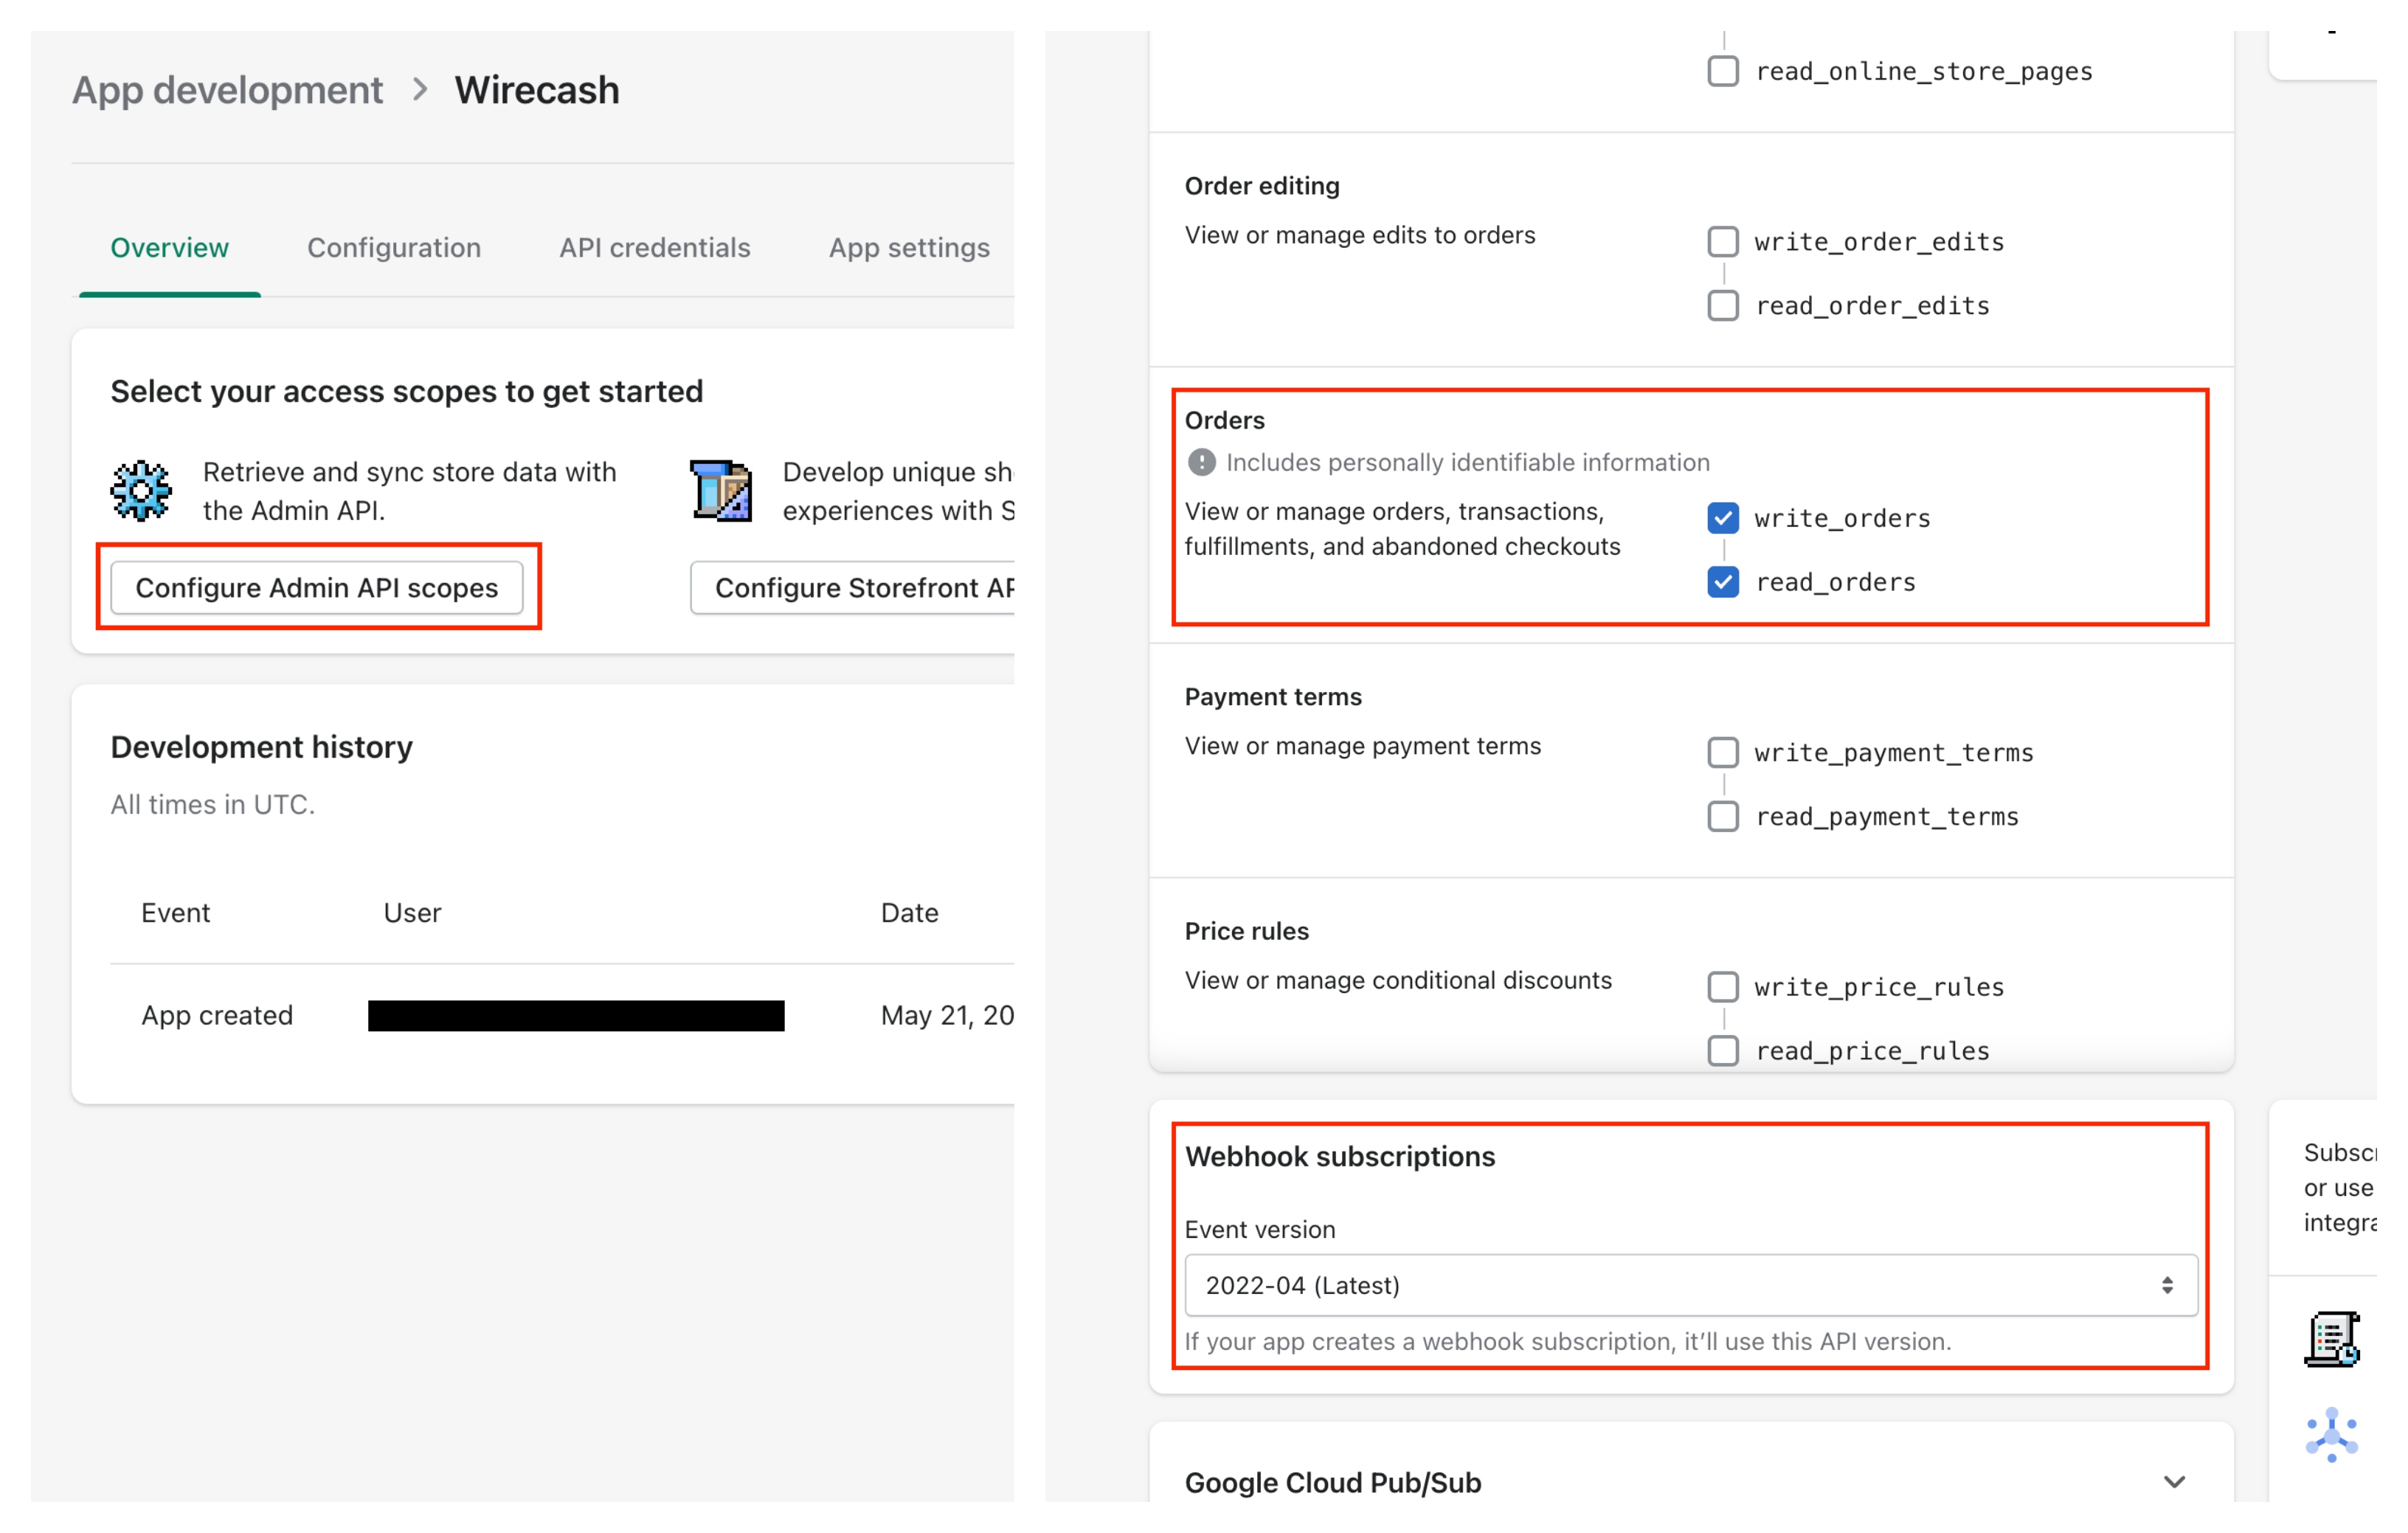
Click Button Configure Admin API scopes
Scroll down to section Orders and activate write_orders and read_orders
At the bottom of the page, in section Webhook subscriptions, choose Latest from the dropdown menu
Click Save
Click Install app
4. Saving API access token
- In tab API credentials, click on Reveal token once and save it in a secure place
Step 2: Creating a webhook
- Go to Settings > Notifications in your Shopify Account
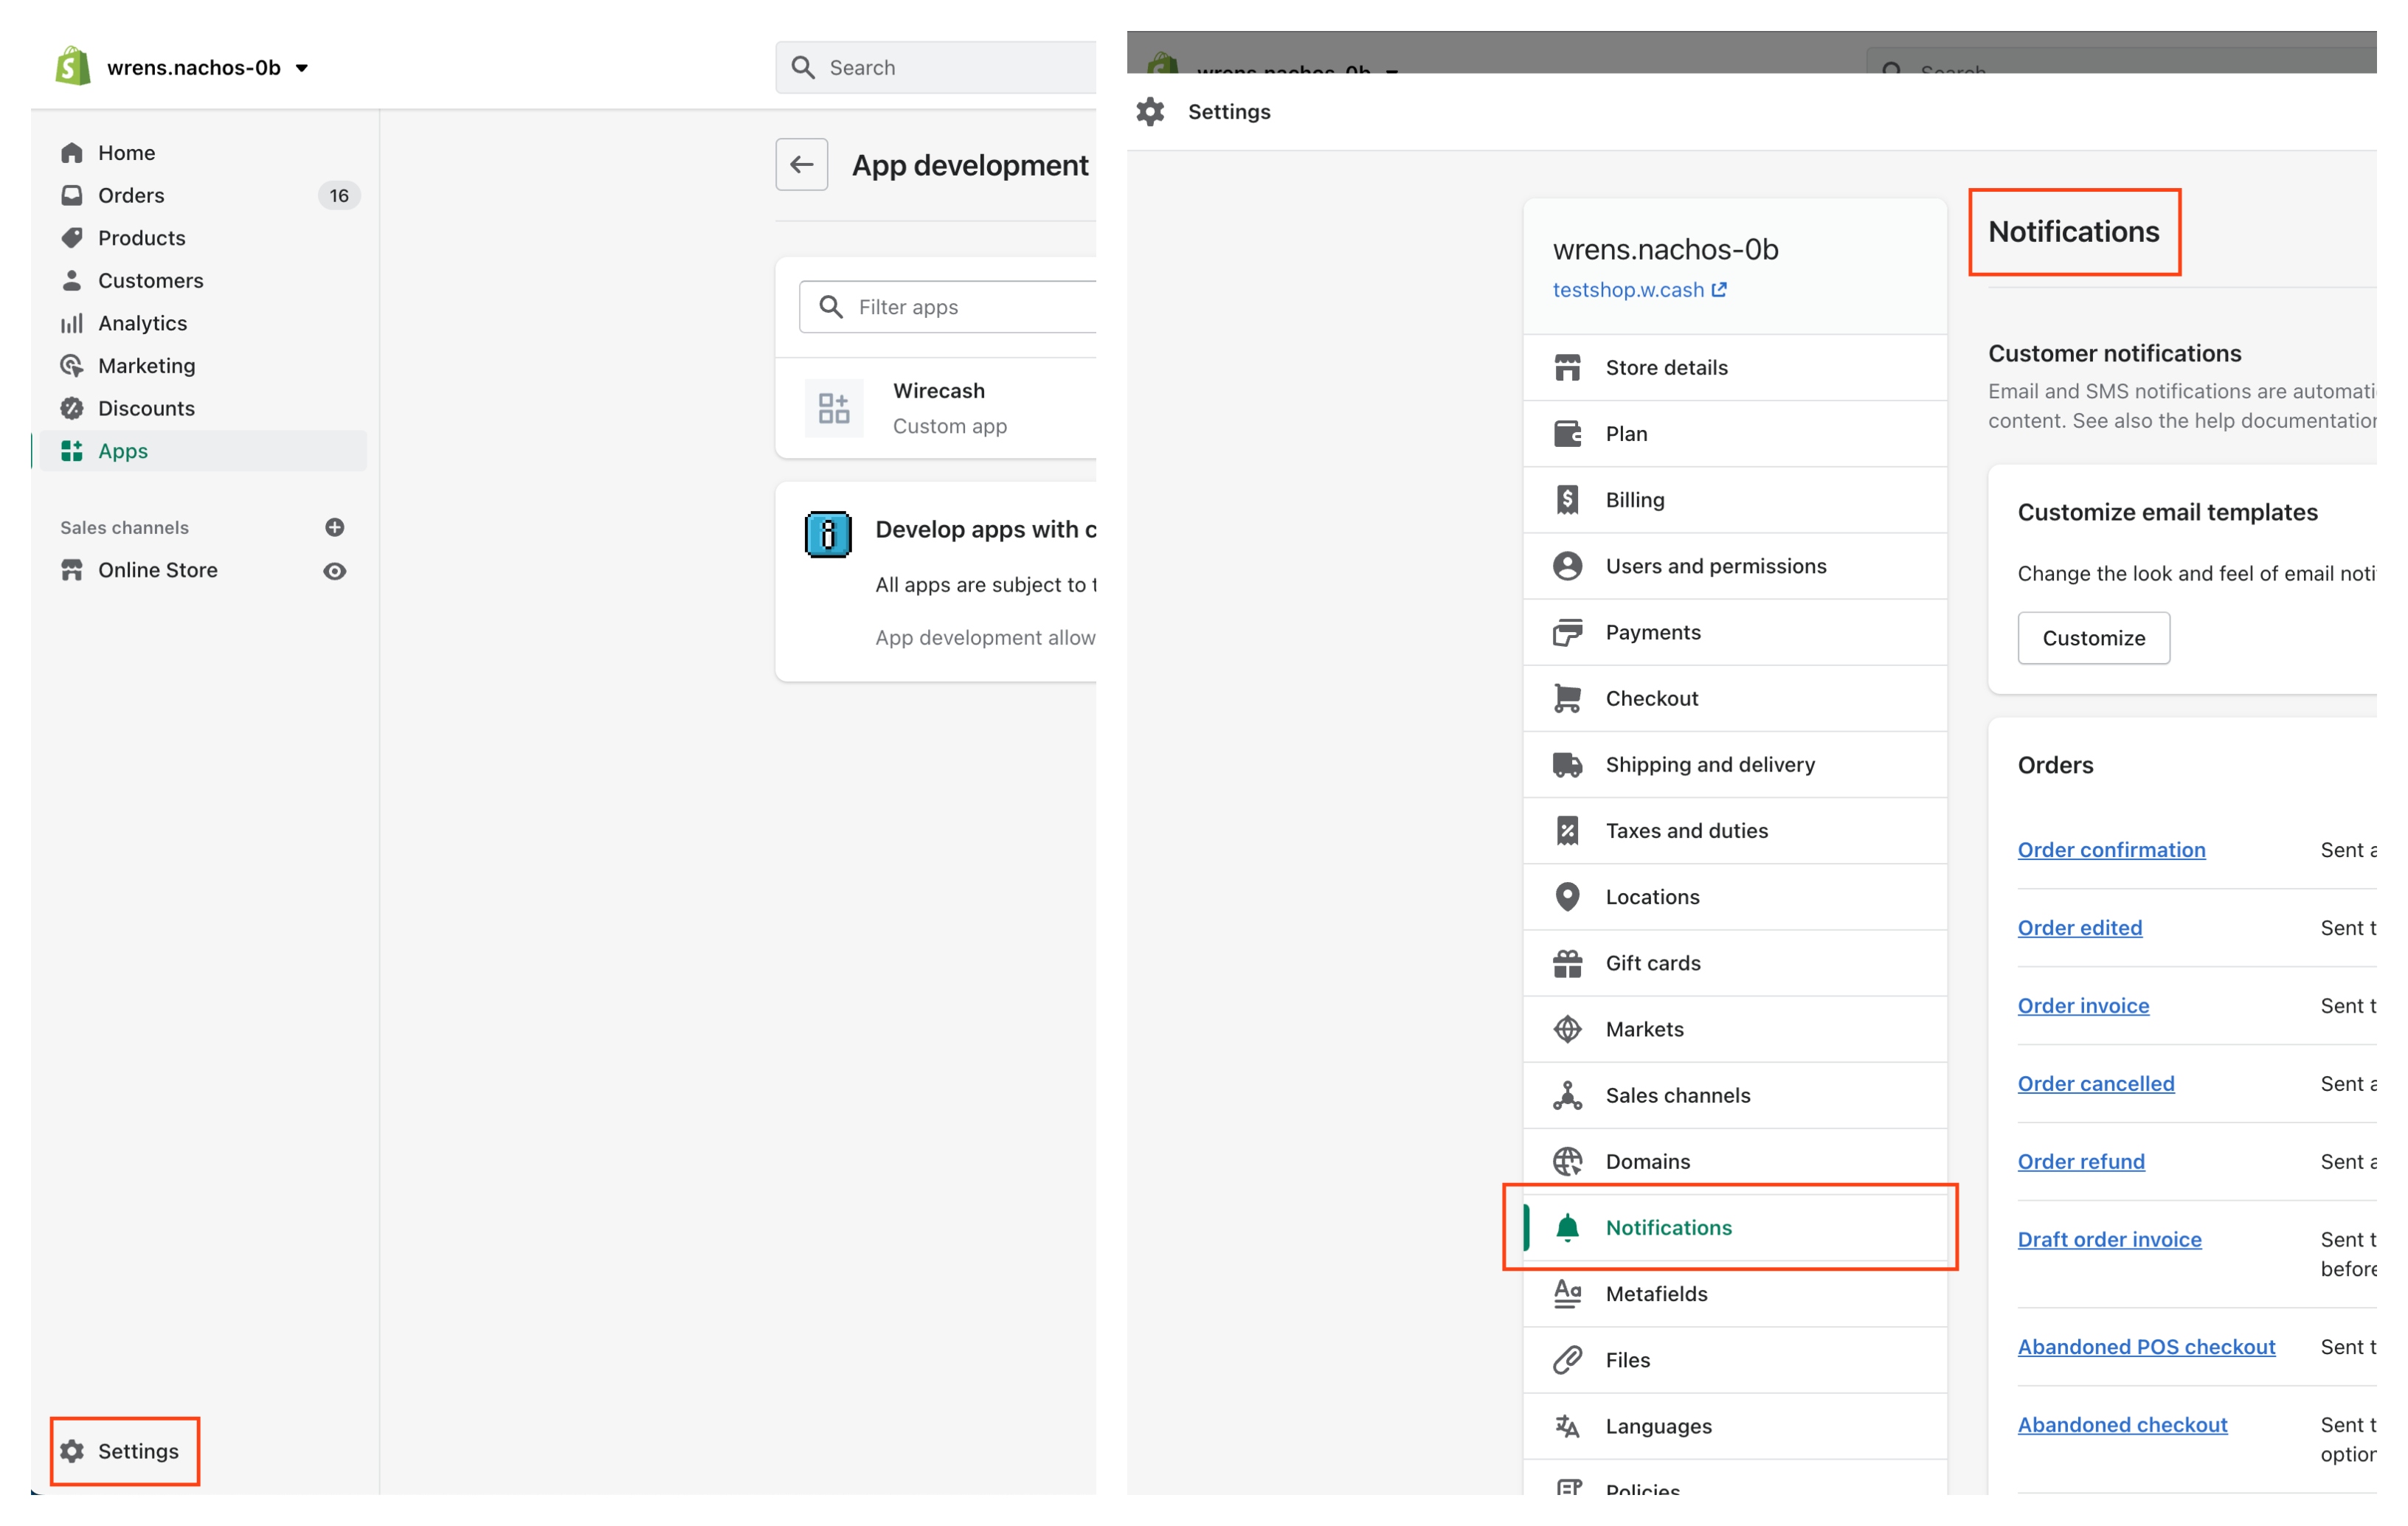
- Find section Webhooks, on the bottom of the page
- Click 'Create webhook'
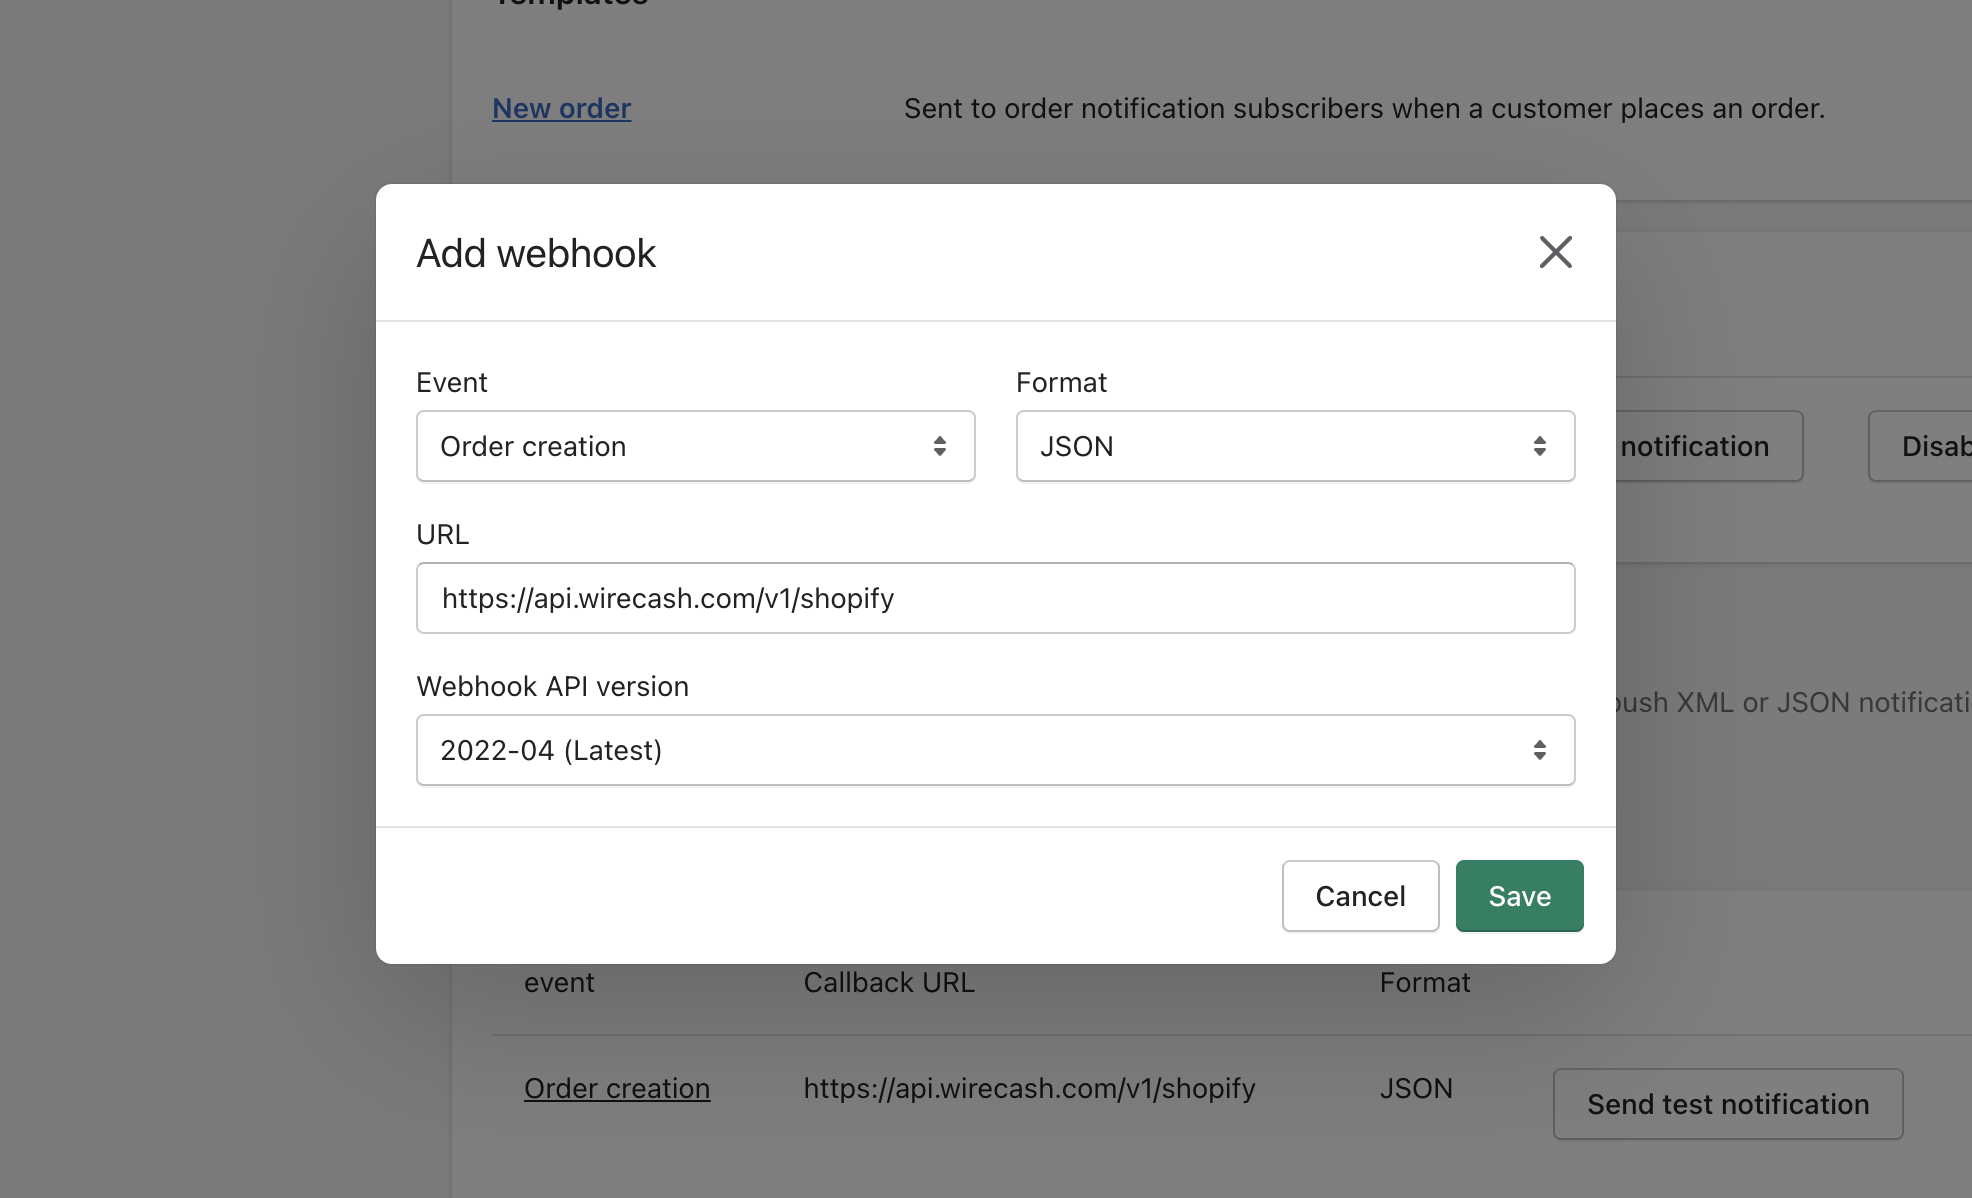
Enter the following parameters in the popup window:
- Event: Order creation
- Format: JSON
- URL: https://api.wirecash.com/v1/shopify
- Webhook API version: Choose 'Latest'
Click Save webhook
Step 3: Creating the Wirecash payment option
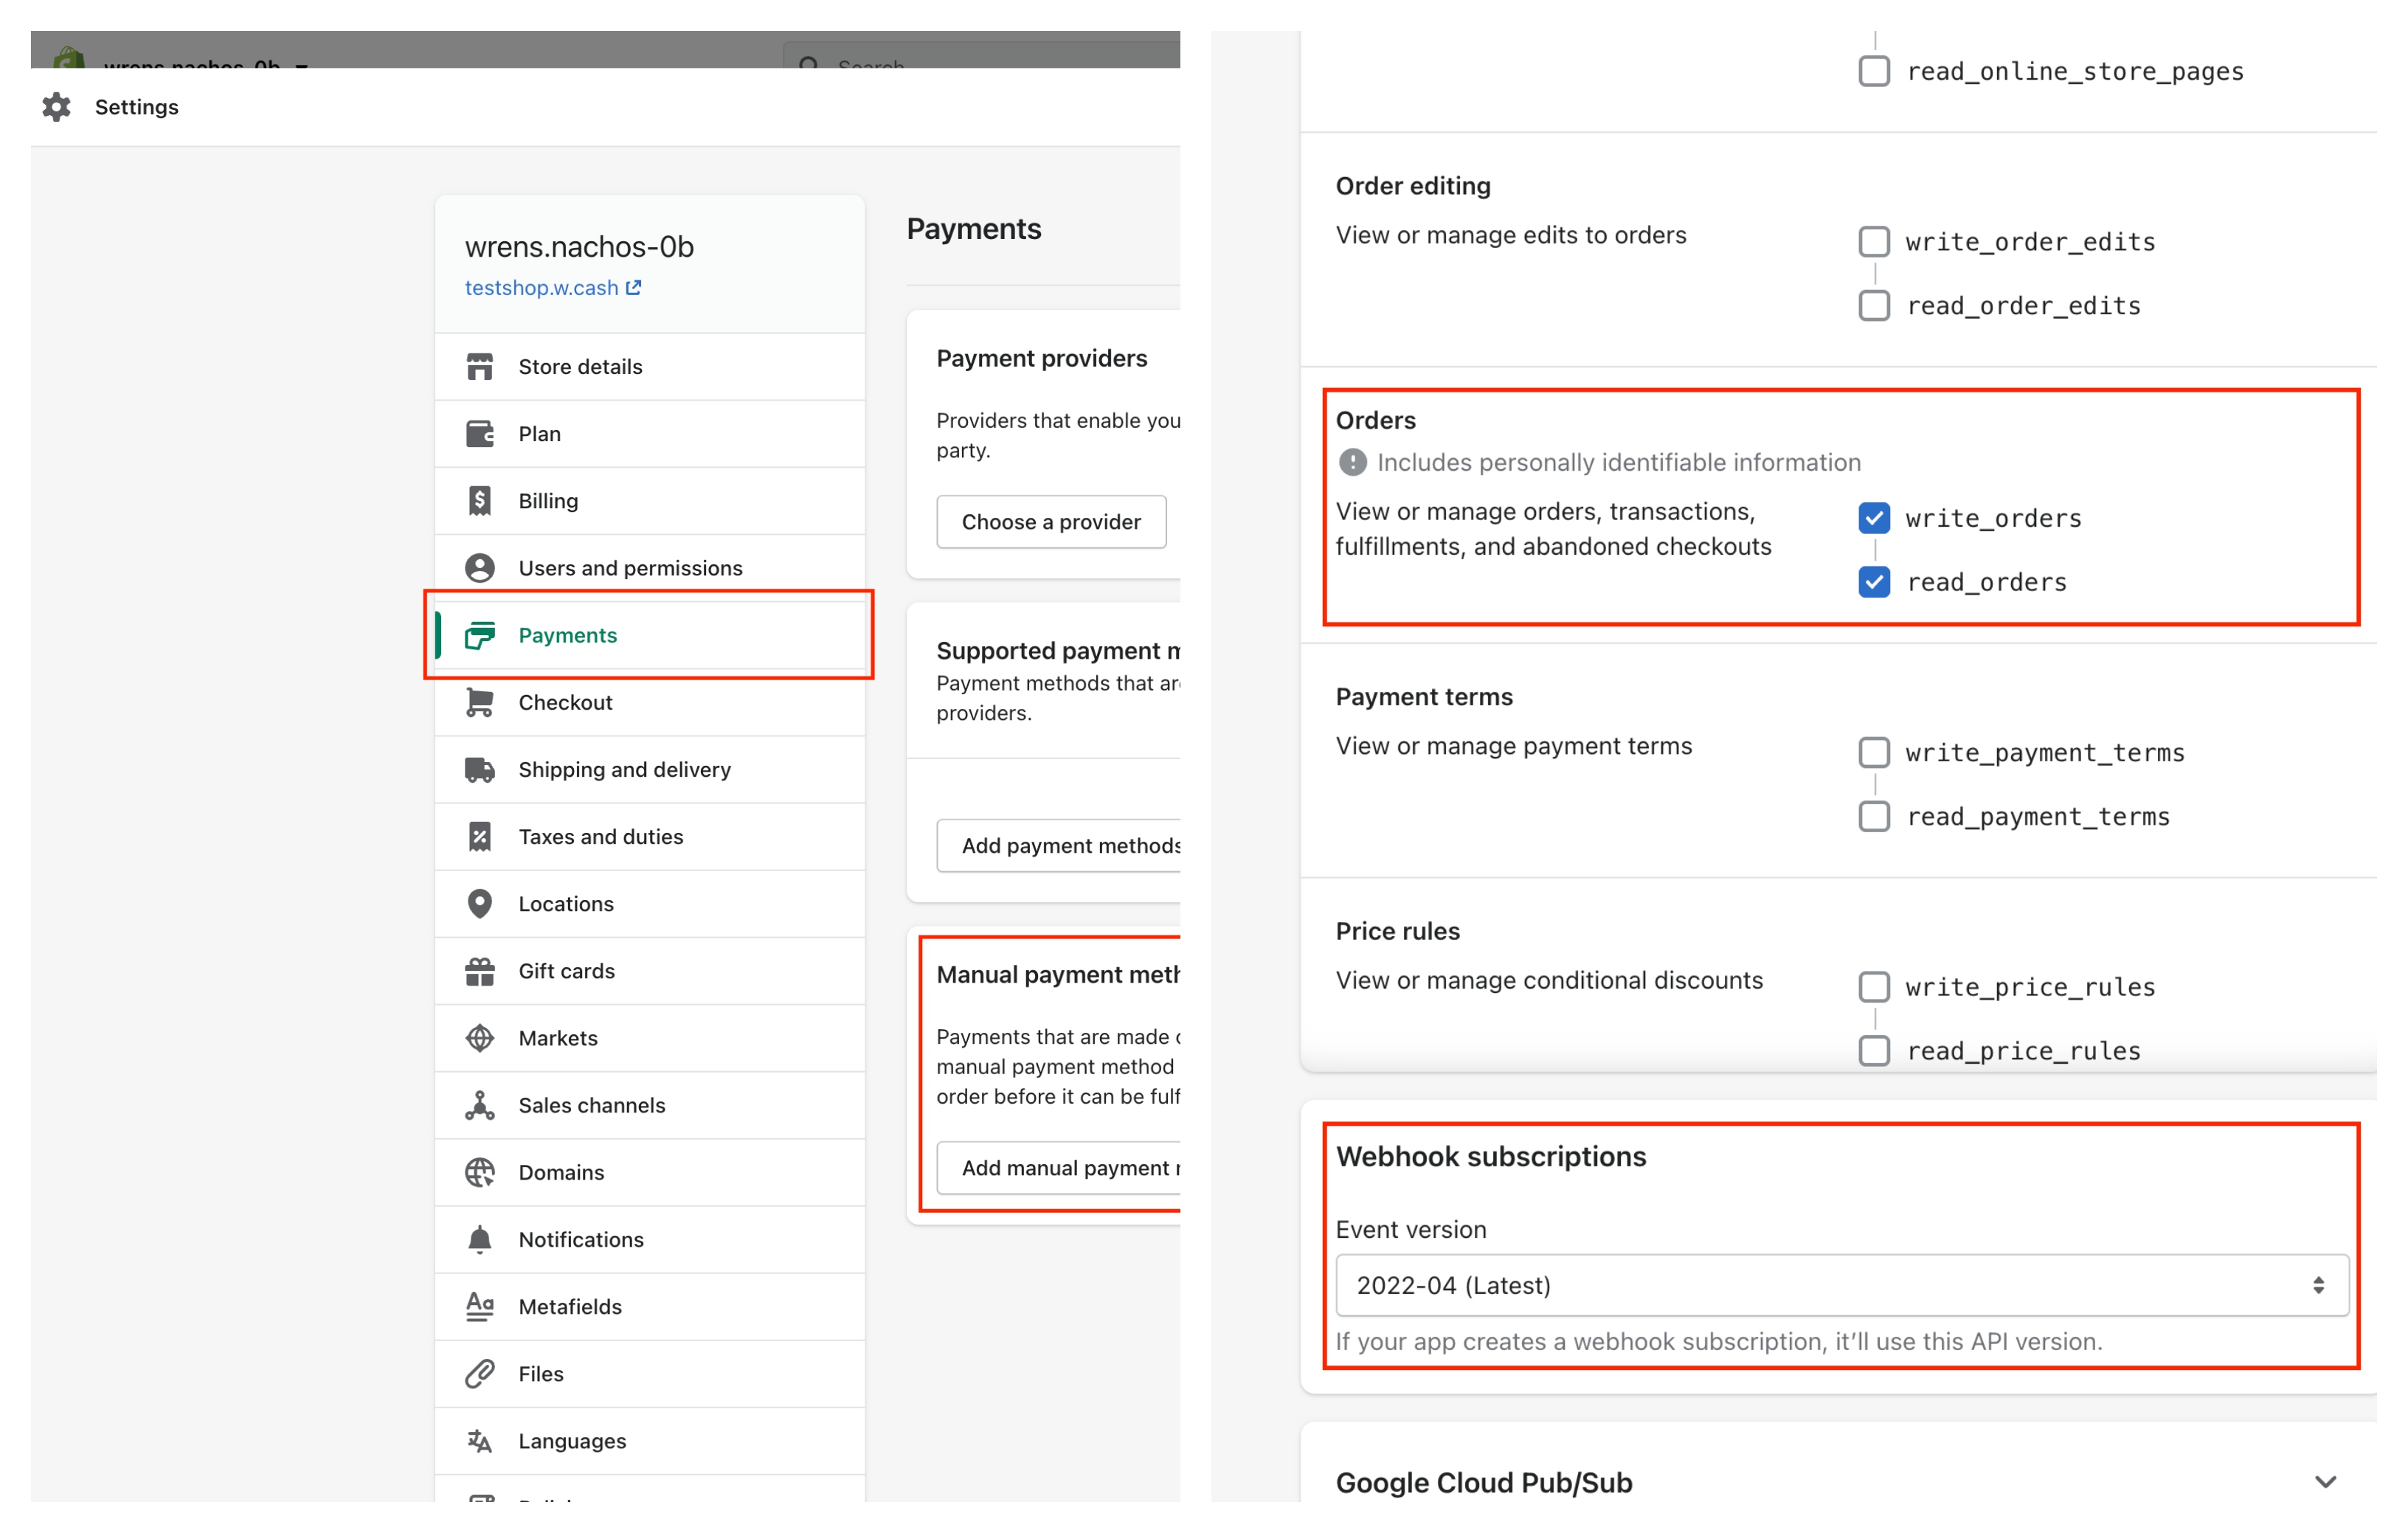
- Go to Settings > Payments in your Shopify Account
- Find at the bottom of the list Manual payment methods and select on the dropdown Create custom payment method
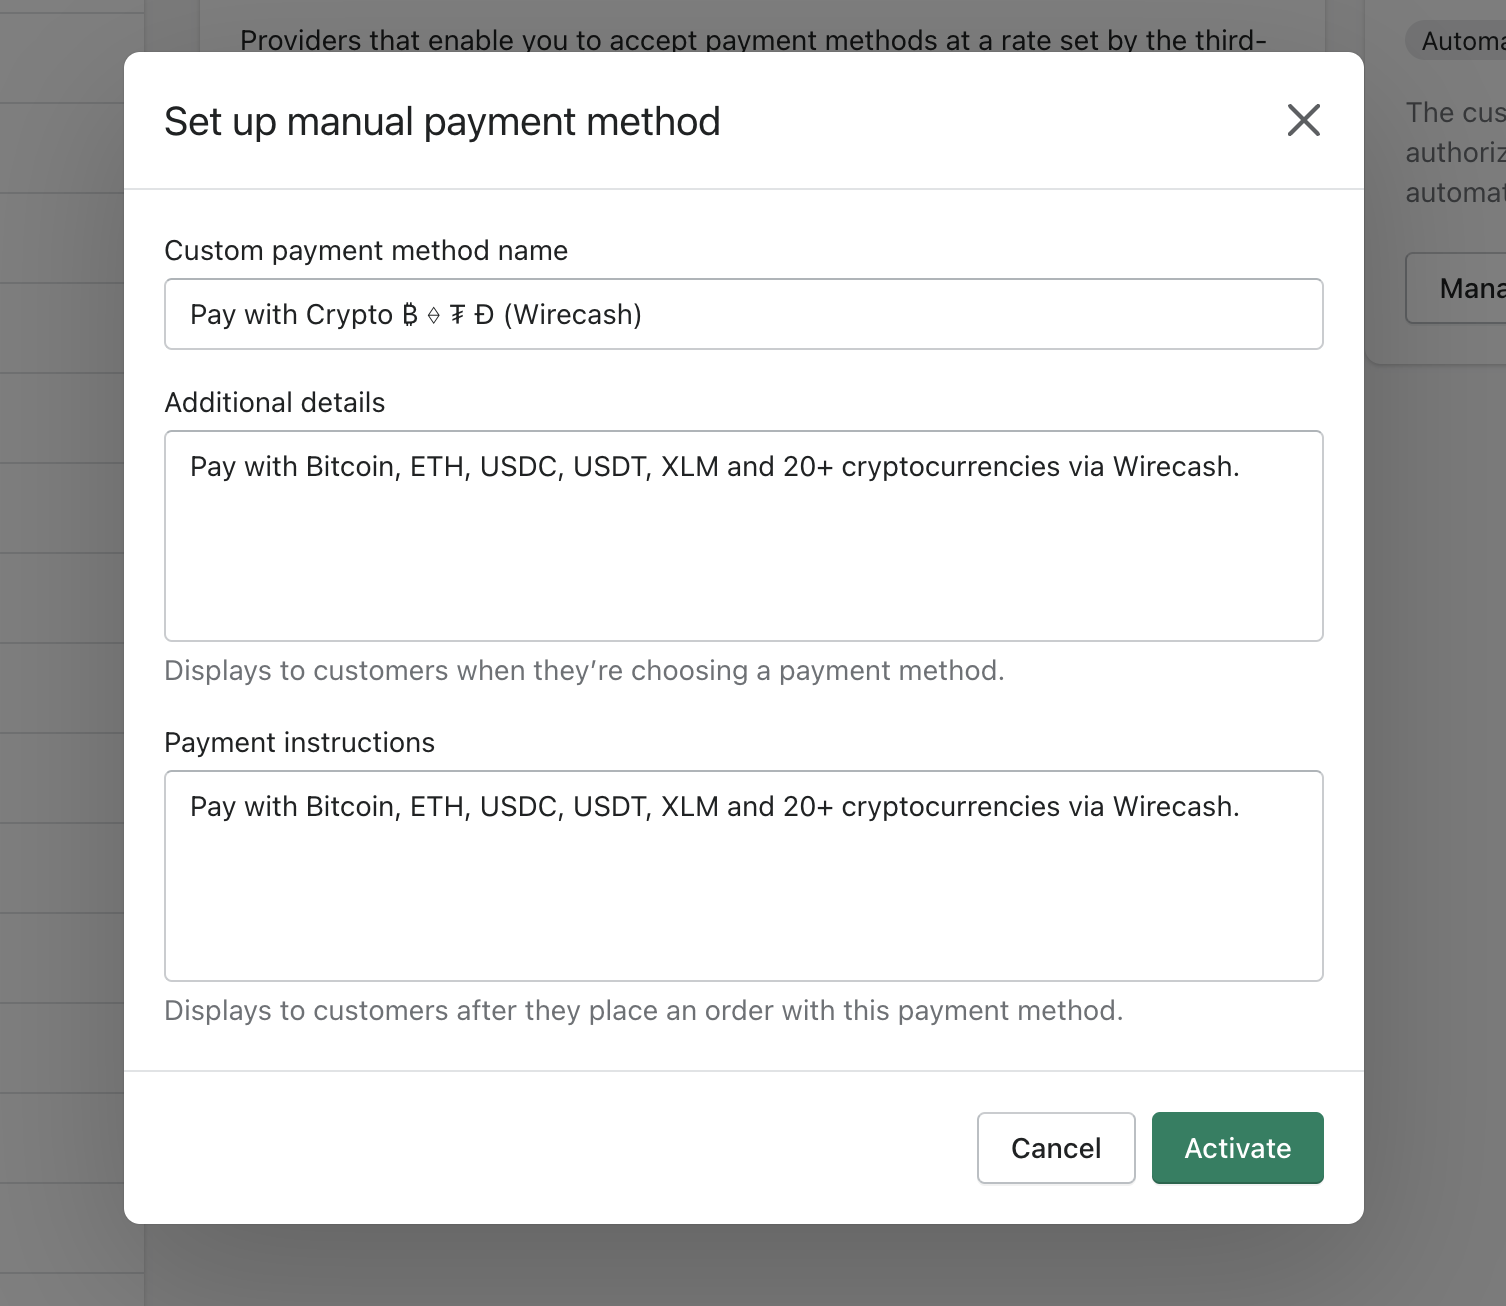
- Enter the following fields:
- Custom payment method name: Pay with Crypto ₿ ⟠ ₮ Ð (Wirecash)
Important: Wirecash name must be included in method name, otherwise we will not be able to capture the payment. - Additional details: Pay with Bitcoin, ETH, USDC, USDT, XLM and 20+ cryptocurrencies via Wirecash.
- Payment instructions: Pay with Bitcoin, ETH, USDC, USDT, XLM and 20+ cryptocurrencies via Wirecash.
- Custom payment method name: Pay with Crypto ₿ ⟠ ₮ Ð (Wirecash)
- Click activate
Step 4: Customizing the checkout order page
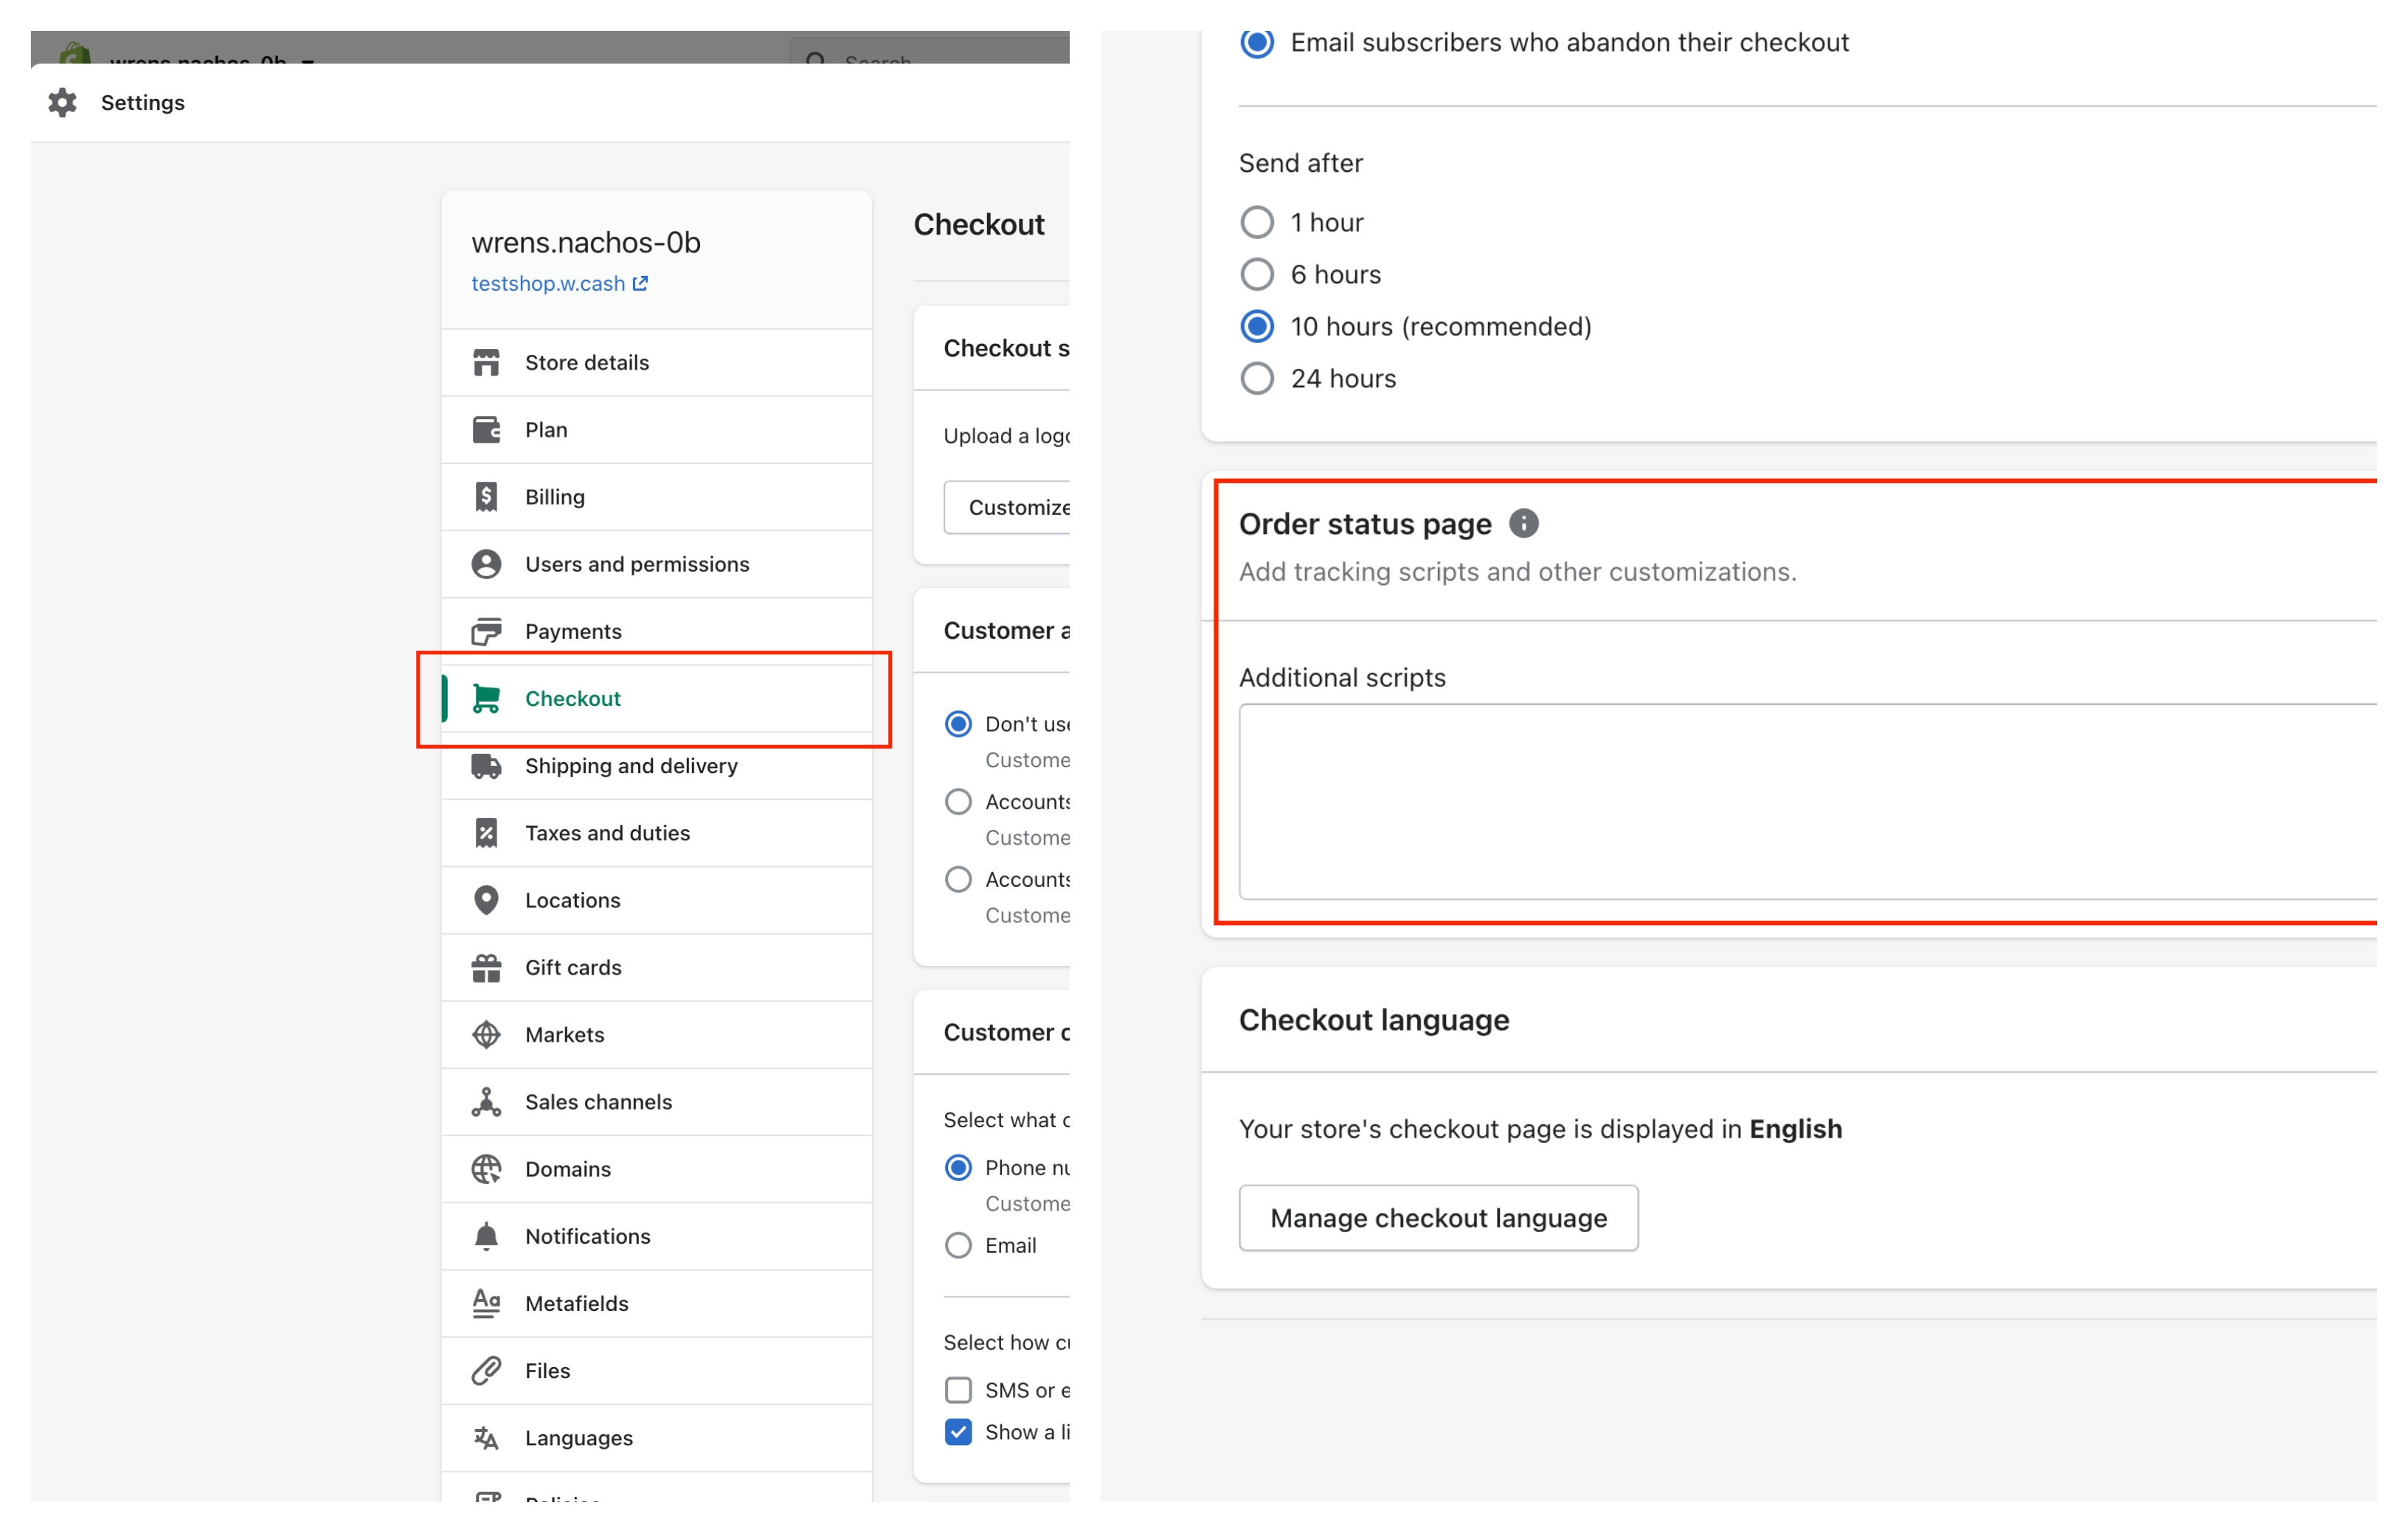
- Go to Settings > Checkout in your Shopify Account
- Scroll to bottom of page and find section Order status page scripts
- Paste the following code snippet into the textarea:
{% assign gateway = checkout.transactions[0].gateway | downcase %} {% if gateway contains 'wirecash' and order.financial_status != 'paid' %} <script type="text/javascript" src="https://assets.w.cash/apps/shopify.js?v1"></script> {% endif %}
- Click save
Step 5: Entering Shopify API credentials into your Wirecash account
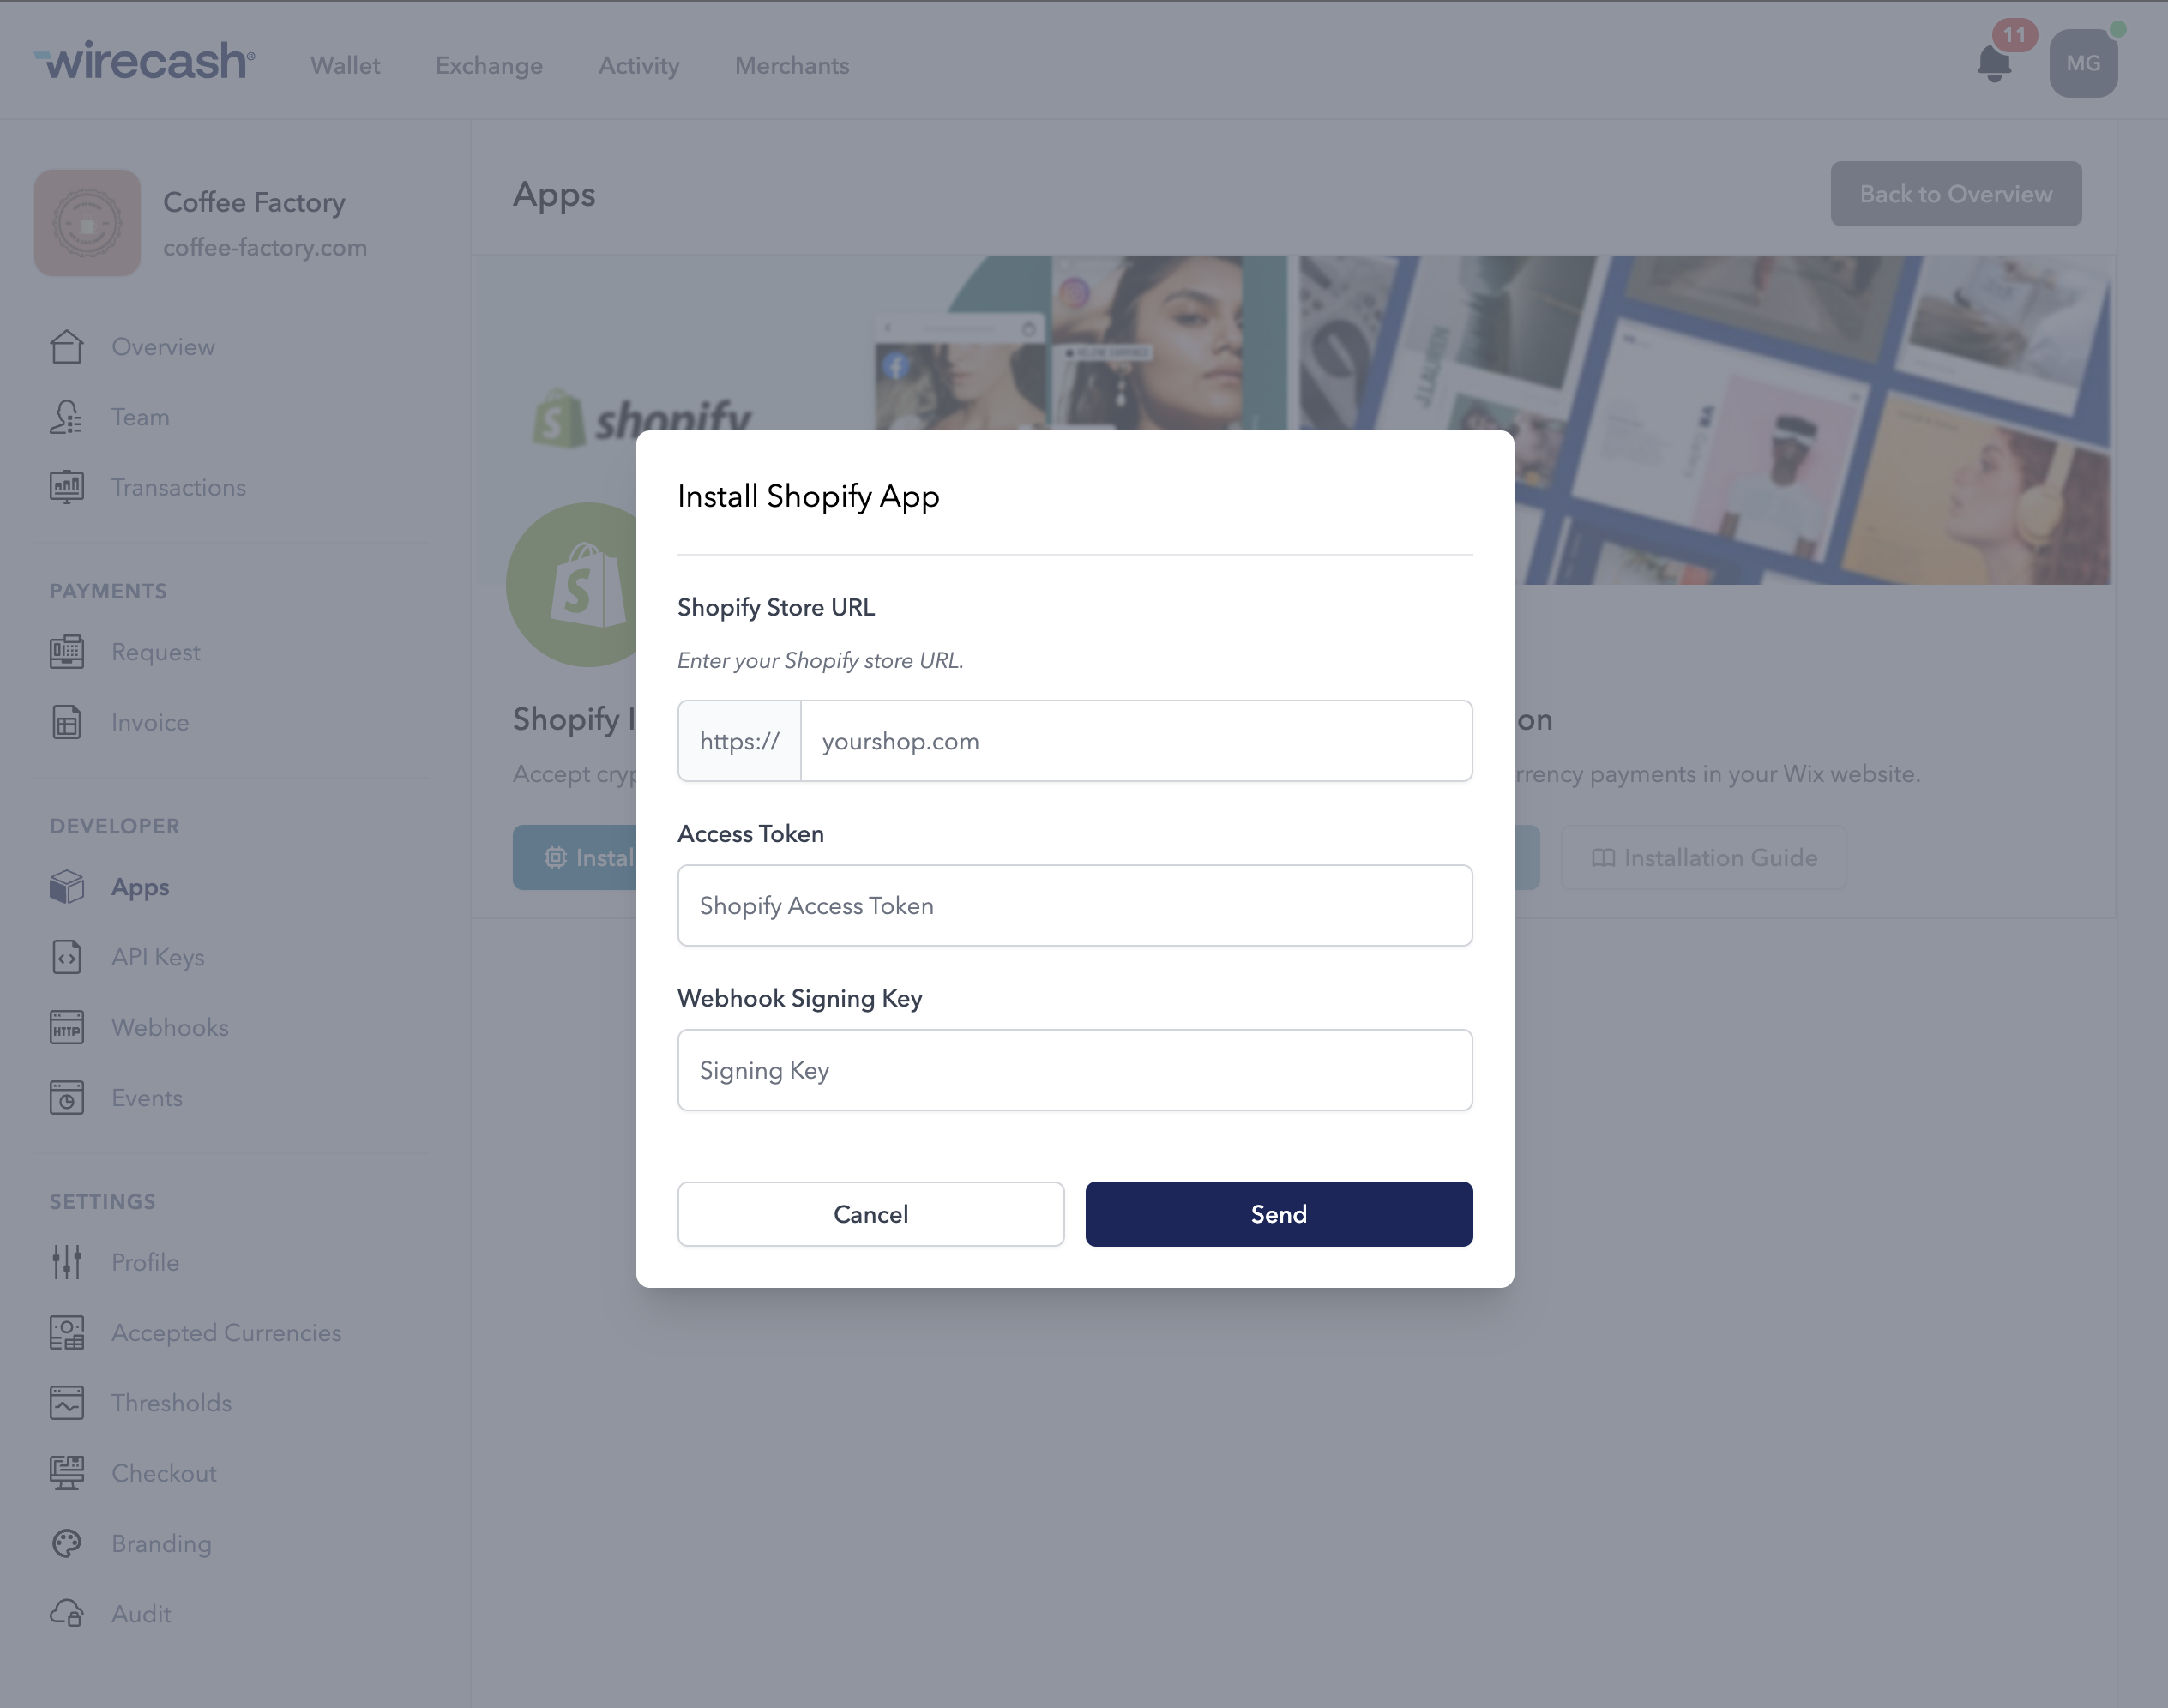
- Sign in to your Wirecash account and go to your desired merchants account and to Apps
- Enter the following fields:
- Shopify Store URL: Your store URL
- Access Token: The API access token you retrieved in step 1 of this guide
- Webhook Signing Key: Go to Settings > Notifications and on the bottom of the page you will find the Webhook section. There you will find the key, which is highlighted in yellow.
- Click send